Today's Open/Close Times based on tide predictions

DateClub TimelineSunsetLow Tide
Fri Sep 29 Noon to 4:46 PMEarly Close6:57 PM0.1 @ 6:39 PM

red means the Club will be closed. Note that current low tides are around 0.1 feet lower than predictions.

Day Leader's WhiteBoard

Whiteboard

Unless whiteboard shows today's date, there is no Day Leader or they haven't signed in yet.

Slow Sailing

b2ap3_thumbnail_Slow-Sail-to-Buoy.jpg

Slow sailing is a Junior skill and an important one. The objective of slow sailing is to get to a fixed point in space (a dock, a man-overboard,
a buoy) with zero speed. The idea is to come in on a close reach course, where you have an accelerator and a brake.
With the mainsheet all the way out, the sail is depowered, and the brake is the wind and sea against the boat. Pulling in the mainsheet on the falls is the accelerator. You line yourself up on a close reach
course and sail to the target.

There are two skills involved:

1) lining yourself up on a close reach course to the target, and

2) slow sailing on that course to it.

Let's talk about hitting a buoy at zero speed, as it's the hardest of the maneuvers. When you dock, you usually have some room for error, as you don't have to get to a precise point on the dock. But wait, what about a busy Saturday where you have to thread the needle between the only two boats where there's any space between them to dock? If you can lightly touch a buoy on a slow-sail, you can do precision docking.

Continue reading
  8347 Hits

Sailing Small Circles

Sailing Small Circles
b2ap3_thumbnail_Small-Circles-Ideal-Circle.jpg

Small Circles

This is one of the most difficult Junior skills, and it's quite important. But why is it important? In real life, how many  small circles are you going to do? Probably none, after you pass the Junior Test. But you probably will need to do fast turns upwind or downwind, and do fast tacks and gybes, possibly to avoid disaster (like hitting something). And maybe with newbie crew. Think about approaching the dock on a big south wind and getting turned in the wrong direction (like into the sea wall). That's what this maneuver is about. You may never do another full circle in your life, but you may need one or more of the maneuver's components.

The maneuver is also a stress test of your sailing skills. You have to do a bunch of things quickly and competently without time to think - they have to be instinctive. It's also a stress test of your crew communications skills for the same reason.

A real circle?

First of all, it's not really a circle. We think of it as looking like this, here counter-clockwise around a buoy:

Continue reading
  10180 Hits

How to Make the Most of your Weight in High Winds

How to Make the Most of your Weight in High Winds
b2ap3_thumbnail_Boat-Diagram.png

During the summer months or during the addiction-satisfying winter storm sailing, you can often find yourself overpowered. I’ve also heard of this several times during senior tests where the tester “falls” overboard for the legendary single-handed man overboard, occasionally where the tester is “unconscious”, typically in something like 20 kts. As the wind comes up from a comfortable 10 kts, the full sailed Bahia and JY will begin to require a bit more leverage than hiking out supplies, depending on crew weight. This is the beginning of the wind range that requires, or at least benefits from, using the trapeze. If you’re comfortable with your crew and/or your ability to drive the boat, start to use this. It’s a lot of fun to trapeze while single-handing and is arguably the most fun you can have without flying the kite, but be prepared to swim on your first few outings.

As the wind increases further to the over 15 kt range, the challenge really starts to kick in. Depending on your and your crews weight and skill, you'll need to consider various ways to depower, the most obvious being reefing. If you're luffing your sail more than not, you should be reefed. Another way to depower your main sail, is to pull on your cunningham. As the wind comes up, you should also use your vang/gnav to flatten the sail and change the placement of your draft in balance with your additional cunningham. This is the standard sail trim and depowering technique. As you struggle to keep the boat powered and moving, you can start to ease your jib a bit. This has the tendency to twist off the top of the sail and allow the boat to breathe a little bit by opening the slot between your main and jib. Closing this slot is what causes the “speed bubble” in the main, due to the wind coming off the jib backwinding and the main. As you’re “more” overpowered, you can ease your vang/gnav to twist off the top of your main sail.

One of the things that I haven’t seen done often at CSC is changing the placement of the centerboard while sailing. It’s commonly thought, at least at first that your boat is “under control” if it’s upright, but in reality, your boat is only under control when you are able to make headway and able to maneuver in some capacity. For this reason, I suggest that when extremely overpowered (repeatedly capsizing or completely luffing), you try raising your centerboard a bit. If you look at the diagram, you can see that as the length of the centerboard is reduced, you allow the boat to slip sideways more, but at the same time, you’re reducing the rotational torque that it’s causing on the boat by reducing both its lever arm and area. This allows the boat to slip sideways more but also reduces the leverage and reduces the heeling “force.” Although you may immediately argue that this is hurtful to your ability to get upwind, it allows you to trim your sails as opposed to luffing. When your sails are luffing, the only force on them is to leeward. However, once your sails are trimmed and have some proper shape, you have a driving force forward. For this reason, it is best to trim your sails to your course, then trim your weight and centerboard to match each other in their torque (rolling force) on the boat. As the boat increases in speed, your centerboard will create lift, which will “lift” you to windward. This lift is proportional to your speed, so as your boat speed increases, your leeway will reduce dramatically. This is much preferred over the scenario where the overpowered boat drifts sideways and you can’t sheet the sails without risk of immediate capsize. 

In other words, if we focus on the rotation portion, the torque counteracting the wind and water comes from the crew weight (or the lead at the bottom of the keel in a keelboat). Torque is force multiplied by length, so getting your weight out of the boat more, such as being on the trapeze or hiking, benefits your righting moment dramatically. This is part of the reason sails are lowered when it’s windy, it reduces the heeling force (torque) on the boat. Likewise, you can do this by lifting your centerboard to “reef” your centerboard. This, like a reefing a sail, both reduces the area as well as the length over which this force is acting.

Another important thing that isn’t often mentioned around the club is the region around a beam reach that opens up in (very) high winds, which is affectionately called the zone of death (ZOD). The ZOD arises when it’s too windy to keep the boat upright with all your weight utilized to its limit on a reach. This is basically when you find yourself completely overpowered. In any case, the existence of the ZOD means that you are now limited to only upwind and downwind sailing and not too much in between. This is a result of a beam reach being your fastest and most powered up point of sail. When you’re sailing in winds with the ZOD, your next biggest concern, other than staying upright when sailing in a straight line, is getting between up- and downwind courses. To do this, you must make a smooth and decisive maneuver to bear away. It’s helpful to have your weight toward the back of the boat and have pre-eased the jib. Once downwind on a broad reach, you can relax a bit and steer for heel with the main eased a few feet off the aft quarter and ease in the gusts. The most important thing when sailing in these conditions is to keep the boat moving and flat. Once you have leeward heel, you will likely round up and broach, leading to your next chance to master the bear away. 

Continue reading
  7907 Hits

Demystifying Apparent Wind - Part 3

b2ap3_thumbnail_Apparent-Wind-Downwind.gif

The last in the series - Apparent Wind downwind.

It's hard to steer downwind. The waves toss the boat around more, and if you get tossed too much, you'll gybe when you don't want to. You can capsize on a broad reach in heavy winds and seas.

The biggest thing you have to deal with is apparent wind. On a downwind course, small changes in course, wind speed, and wind direction produce large changes in apparent wind.

We'll use the same 5 kt. true wind we've used before and the same Bahia-like boat. You're almost dead downwind - just 5 degrees short of it. Here's what it looks like:

Continue reading
  5612 Hits

Demystifying Apparent Wind - Part 2

b2ap3_thumbnail_Apparent-Wind-Puff---Close-Hauled.jpg

Last time, we looked at apparent wind and how it changes as you change point of sail. In that discussion, the speed and direction of the true wind was the same and the boat direction changed. Here we look at what happens when you're keeping the boat course the same, the wind direction doesn't change, but the wind speed does. It increases (a puff) or it decreases (a lull). You get both of these as you're traversing the Novice Area on a normal day (westerly winds), as the trees and gaps between them on the breakwater to the restaurant cause this uneven wind.

Again, we're using our Bahia-like dinghy and a 5 kt. wind. You're sailing close-hauled, so it looks like this:

The boat is 45 degrees to the true wind, but only 30 degrees to the apparent wind. Normal. Then you get a puff, say a pretty big one (10 knots, double the speed but out of the same direction). In that instant, your boat speed doesn't change (it needs time to do that), but your apparent wind does. It looks like this:

Continue reading
  8212 Hits

Demystifying Apparent Wind - Part 1

Demystifying Apparent Wind - Part 1
b2ap3_thumbnail_Apparent-Wind---Close-Hauled.jpg

A very common problem my students have voiced is that they have trouble figuring out where the wind's coming from. On the one hand, it shouldn't be so hard - turn your head and feel the wind on your ears. When it's the same on both ears, you're either looking straight into the wind or straight away from it. Or (less accurate) look at the yarn on the side stay.

Yet it's not so simple. You think of the wind as coming from the same direction, but when you sail, it doesn't seem to do that. It seems to shift a lot. And "you told me we couldn't sail higher than about 45 degrees into the wind, but that yarn on the stay has a much smaller angle than that". And (yet more observent) "We're sideways to the waves, so we should be on a beam reach, but the yarn says we're still somewhat upwind".

Welcome to the world of apparent wind. This is a simple concept to explain and  understand at a high level, but very hard to get at a detailed level. Everyone gets the simple explanation - you're peddling a bike at 10 knots on a calm day, what do you feel? A 10 knot headwind. The speed you're generating adds to the wind speed to create the wind you feel, the apparent wind. The apparent wind is what you and the bike feel. Peddaling 10 knots in a 10 knot headwind, and you're pumping against a 20 knot apparent wind. Doing the same in a 10 knot tail wind, and Bob's very much your uncle.

Those with a math background easily grasp that this is a vector algebra problem - the boat wind speed adds up with the true wind speed as vectors, where both the speeds and the directions interact. But even if you get that, it's truly hard to see how it all plays out on the water. And I'm speaking as someone with a graduate education in mathematics. In editing this blog, I realized that I had messed up a calculation in my first draft. If you sit down to do the calculations, you have to determine what your boat speed will be at a given true wind speed and point of sail (angle of the boat to the wind). Polar performance diagrams will show this, but good luck finding these for any of our dinghy's.

So my point is that it's quite difficult to build a mental model of this. Instead, you can get a feel of how it happens on the water without trying to understand why, exactly. I did the math from a guess of a polar diagram for a boat similar to a Laser Bahia at 5 knots wind. If you're not racing, it doesn't matter how accurate this is. But it should be pretty typical.

Continue reading
  18959 Hits

Docking in Low Tide

Docking in Low Tide
b2ap3_thumbnail_Low-Tide-Docking.jpg

I posted while ago on launching in low tides. The idea was close attention to sail trim. The common mistake is to over-sheet the main leaving the dock, and even with full centerboard you'll drift sideways into the Cal Adventures dock.

Here I want to talk about docking in low tide. 

There are several problems. One is recognizing that it's low tide. It's easy going out with a "fresh" boat (you push the centerboard/rudder down and feel the mud, so you bring it up a few inches). But coming back you have to recognize and plan it. My rule of thumb for Bahias is that a tide of under +2.0 means you have to raise the centerboard and/or rudder. Plan for it, and raise both on the way in. When it's all the way down, the centerboard is about a foot lower than the rudder fully down, so you can adjust the two differently.  In very low tides, the rudder will be just below the water, horizontal. It will work, but it will be very  hard to use, and hard to turn quickly. Also, the stress on the rudder when it's parallel to the water surface is in a direction it's not designed for. So it's best to limit the amount of time you sail with the rudder in that position.

You will find that the boat handles differently with the centerboard up (or raised above the normal, fully down position). An important thing in docking is that the pivot point of the boat is farther aft, which means that where the boat actually turns in the water will also be farther aft.

The dock approach will be different in low tides. You can't use the standard "come in on a beam reach and slow sail to the dock". Your leeway with the centerboard up will be too much. Even if you aim for the south end of the dock, you'll be lucky not to hit the sea-wall (painful personal lesson here).

Continue reading
  8549 Hits

Advanced Boat Handling - Another Great Advanced Dinghy Lesson

Advanced Boat Handling - Another Great Advanced Dinghy Lesson

The Advanced Dinghy lessons this year have been uniformly great.

This week's was no exception - boat handling by Jonas Kellner, a club member who's been sailing for over 30 years and teaching sailing and racing for almost as long.

Someone asked Jonas before the class whether he'd be teaching racing tactics. He said that he could, but knowing the best tactic for a given situation is useless if you can't execute the maneuver. He'd be focusing on the latter.

We had a pre-sail briefing, where Jonas explained what we'd be doing. 8 exercises around a set of buoys in a line perpendicular to the wind (so basically beam reach). The first and last exercises were slalom course, where we were to keep as tight to each buoy as we could.

The intermediate exercises were ovals around the set of buoys (counter-clockwise in all cases). They were technical exercises, designed to improve boat handling skills:

Continue reading
  7312 Hits

Downwind sailing and the evils of rounding up

Downwind sailing and the evils of rounding up

One of the common pitfalls of sailing a dinghy downwind is that in a sudden gust, the boat will start to head up, leading to a capsize. In this blog post, I'd like to share some of my thoughts on the factors in play and how to best deal with them. This discussion applies to sailing with just main and jib, as well as to those thrill-seekers using a gennaker.
 
To begin with, why does your dinghy insist on heading up in a gust? There are (at least) two factors involved. To begin with, your dinghy typically has a bit of weather helm: to get technical, the center of effort (COE) on your sails lies slightly behind the center of lateral resistance (CLR) created by your dinghy's foils. In normal conditions, a bit of weather helm makes for a nice responsive tiller that helps you to better "feel" the boat and the wind. However, as the force on the sails increases as happens during a gust, the discrepancy between the COE and CLR is amplified, causing more and more weather helm. This effect will cause your boat to want to head up more strongly during a gust.
 
However, the natural weather helm caused by the discrepancy between COE and CLR isn't typically what will cause you problems. Instead, it is the additional weather helm caused by excessive heeling. Indeed, as the boat heels more, the hull's interaction with the water creates extra weather helm. Furthermore, your rudder is now only partially submerged, giving you less control over rounding up. And that is just the beginning: assuming that you are sailing below a beam reach, the more the boat rounds up, the more the heeling force on the sails increase. This causes more rounding up, which causes more heeling which causes... you can see that this will probably end with you getting wet.
 
Now that we know two of the main factors in play, let's consider three different scenarios.
  • First scenario: you're sailing on a dead run when a gust hits. The force of the wind on the main will indeed cause the boat to want to round up a bit. However, since you're on a run, it won't cause much heeling, so you only have the first aforementioned factor to deal with.
  • Second scenario: you're on a broad reach when a gust hits. Now you're in trouble -- you have both excessive weather helm coming from the force on the main, as well as weather helm caused by heeling. As you round up towards a beam reach, you can't depower the main, and you may end up capsizing.
  • Third scenario: you're on a beam reach when the gust hits. Again, both factors will apply, but as the boat rounds up above a beam, the main will start to depower, reducing heeling and weather helm and saving your bacon.
From the above analysis, we see that the danger of rounding up and capsizing is greatest when sailing close to a broad reach. But never fear: we have some powerful weapons at hand in combating the evil demon of weather helm.
 
First, we would like to be able to depower the main sail while sailing on a broad reach; this will decrease both natural weather helm and excessive heeling. Our first weapon for doing this is the vang or gnav. Easing this control in a gust lets the top portion of the sail twist away from the wind. While crewing for one of our club's most experienced dinghy sailors during the infamous Fast Track squall of May '12, my skipper had me blowing the gnav in every gust, and this is what let us limp back to the club in (more or less) once piece.
 
Our second weapon in depowering the main is of course the main sheet. If the wind is howling 20 knots and your Bahia is screaming along on a broad reach, chances are that your high boat speed is shifting the apparent wind far enough forwards that your main sheet should not be all the way out. The added bonus is that when the gust comes, you can now ease the sheet to help balance the boat and depower the main. If you instead neglected to sheet your mainsail in at all, you can't depower  by easing the main! 
 
Apart from depowering the main sail, the above analysis tells us that we want to do everything possible to keep the boat flat. Anticipating the gusts and aggressively falling off is key. Likewise, hard, aggressive hiking (or even sending crew out on the wire) are also important. Keep in mind, though, that if you are already hiking out hard before the gust hits, you won't be able to up the ante when you need to. Just as with the main sheet, it is highly advantageous to have a bit of room to make adjustment during gusts. Finally, aggressively sheeting in the jib (or gennaker) in gusts so that it stalls a bit will shift the COE forward in the boat, which will also decrease weather helm. Likewise, raking the centerboard aft slightly will shift CLR aft, also decreasing weather helm.

  12322 Hits

Advanced Dinghy Lessons Start with a Bang!

Philippe on the subject of sail trimming and especially use of the gnav (according to him, an under-used tool).

Philippe is an an incredible sailor and an amazing instructor.  We spent about half of the time on land with an RS Venture looking how the various sail controls affected sail shape and talking about what sail shape you want for what conditions (it was blowing over 15 kt. this evening, by the way, with pretty big seas - we  had a lot of weight on the boat on land to make sure it didn't capsize into the cars parked near the clubhouse). On land, it was much easier to see the effects of various controls on the sail shape.

This is my lesson summary (feel free to comment):

Scope: Dinghies which generally don't have travelers.

  1. Sail shape is very important. The usual things about depth and power, and location of sail draft. With lighter winds, you want a fuller sail and a draft a bit aft. With heavier winds, you want a tighter sail and a draft forward.
  2. In heavier seas, you want more power, even with stronger winds.
  3. Tensioning the Cunningham brings the draft forward.
  4. The outhall affects the lower third of the sail.
  5. Several controls bend the mast aft, which tighten the sail and move the draft forward. Tightening the mainsheet and the gnav do this.
  6. In high winds, you don't want the boom near the center of the boat, as the lift from the sail is mostly sideways to the boat. But just easing the mainsheet induces twist in the sail. Tightening the gnav overcomes this, allowing the mainsail to go to a better angle, but preserving the sail tightness.
  7. Bearing off from close-hauled, you want to do several things.  One is ease the mainsheet. Another is to keep weight on the windward side to help turn the boat downwind. A third is to ease the gnav (and then tighten it when on course).
  8. Gybe-ing:
    1. Blow the gnav before the gybe (this will depower the sail and cause the top of the sail to back-wind before the bottom of the sail, producing a gentler gybe).
    2. Weight the boat to windward to turn it down-wind through the wind. If you reach across to pull the boom across, you'll mess this up.
    3. If done correctly, the wind will gently pull the mainsail across. Grab the sheets as this happens to buffer it.
    4. Power up after the gybe by tightening the gnav

Then we went out and did it, both upwind and downwind. And it worked. I was prepared for hikiing really far out with the winds we had, but we didn't have to. And it was amazing how gentle the gybes were with this technique. Note that in bearing off and gbye-ing, you're doing what you would do rudder-less - moving weight to turn the boat. After the class, I discussed that with Philippe, and  his opinion (as a racer of some renown) is that the more you can use your weight to  maneuver the boat, the better (i.e. faster) you'll sail.

Continue reading
  6909 Hits

Low Tide Launching/Docking

Low Tide Launching/Docking

We've all experienced this, either as sailors or instructors.

You're going away from the dock, parallel to it, but somehow you're getting pushed sideways into the middle dock. Or you're docking, and you have a huge amount of leeway, pushing you into the seawall.

What I learned in the Advanced Dinghy class from Yves is that it's all about sail trim. Even with the centerboard completely down, you have a huge sideways force if you oversheet. Not only is the sail not as efficient as it could be, but the force is more sideways than forward. With the centerboard up (for low tides), the effect is worse.

This is the season of rip-roaring tides (it can go from more than 6' at noon to negative '1 at 6 pm, and the dock time has been as early as 3:30 some weeks).

Thanks to what I learned from Yves, I've been doing the following in my lessons when we had to dock with less than full centerboard. As soon as we get away from the dock, I raise the centerboard, and we sail, completely focused on sail trim. Jib is easy, mainsail more difficult (but more important). I try to get the students completely focused on sail trim. I tell them "They'll tell
you that you can't tack without a centerboard, but they're wrong" after they've tacked without a centerboard.

Continue reading
  7696 Hits

Main Sail Trim by the Tell Tales

Main Sail Trim by the Tell Tales

There's a great book called Mainsail Trimming by Felix Marks that goes into this in great detail. A lot of it doesn't apply to dinghies (travelers, for example). But one thing does - trimming the mainsail using the mainsail telltales.

The telltalls are on the leech (back edge) of the sail, and when sailing upwind from a beam reach  and forward (when the sail is a wing), the tell tales should be streaming, just like both of the jib telltales. But what if they aren't? For the jib telltales, we have the guidelines "move the sail toward the telltale that isn't streaming" or "move the tiller toward the telltale that isn't streaming", and students seem to get that. But I don't think we talk enough about trimming the mainsail using the telltales (I could be wrong here, just my observation).

So (on a beam reach and above), if the mainsail telltales aren't streaming, they're curling to one side--windward or leeward. That's just like one of the jib telltales not streaming while the other one is. Move the sail that direction (as in, ease out if streaming to leeward and trim in if streaming to windward), or move the tiller that direction. Essentially the same thing as you would do to trim the jib.

I've seen a tendency in students to oversheet the main, so I think it's useful to sensitize them to this, and the mainsail telltales are one way to do this.

You can also use the mainsail telltales in a gybe. I went on the water once with Stefano Maffuli and a friend of his who had been head instructor at St. Francis Yacht Club (grazie, Stefano). He said that the mainsail telltales were the best indicator of when to pull the main across in a gybe. They show exactly when the main is back-winded--a much better signal than the jib coming across.

  14259 Hits

Tips for skippering with crew on the wire

Tips for skippering with crew on the wire

Almost all of Cal Sailing's dinghies are equipped with a trapeze kit, and with good reason: our typical stiff summer breezes make it all but a necessity to send someone out on the wire. Having crew out on the wire  can be tons of fun for both you and your crew, but can also be quite a challenge. Here are some tips which can help.

Let's assume that you as skipper have two goals:

  1. Move the boat upwind as quickly as possible.
  2. Make your crew feel comfortable on the wire.

Now, your crew will probably be most comfortable if the boat is kept relatively flat, sudden changes to heel angle are avoided, and the crew is not required to shift her weight. In other words, she can calmly stand on the rail doing nothing but admiring the view (and calling out gusts and lulls).

On the other hand, in order to make your boat move upwind as quickly as possible, you want to keep the boat flat, and to keep  your close-hauled jib at the proper angle of attack to the wind, so that it neither stalls nor luffs.

You, the skipper, have three controls at your disposal: tiller, main sheet, and your body weight. So how do you keep both your crew and the boat happy? Firstly, steer with the tiller to keep the jib at the proper angle to the wind. Secondly, use a combination of body weight and main sheet trim to keep the boat flat. In practice, it is a good idea to hike out moderately and then trim the main accordingly. Indeed, the more you power up the main (while keeping the boat flat), the faster you go. Furthermore, if the wind comes up or down, you still have two controls at your disposal: in a gust, dump the main and hike out hard, and in a lull, sheet in and shift your weight leeward.

Continue reading
  8219 Hits
Tags:

A Couple of Capsize Recovery Tips

Appropriate capsize recovery techniques vary by wind speed, and there are several methods available for righting the boat  in situations where the wind is high and you are unable to keep the boat from re-capsizing. However if you can recover without setting the anchor or having a crew member swim around to the bow to line the boat up into the wind, the recovery will be quicker and easier.

To recover on the first attempt (without re-capsizing) with the least effort in the broadest range of conditions, here are two very useful tips.

First, uncleat the gnav/vang (in addition to the mainsheet & jib), as this will reduce the effect of the wind on the sail when the boat comes back up.

Second, while up on the gunwhale, before stepping onto the centerboard, consider what effect the wind direction will have on the boat once it comes up, and plan the effect the arrangement of your and your crew's weight will have on the boat's balance at that point.

  • If the mast is pointing away from the wind/hull is towards the wind, the crew will be on the downwind side when the boat comes up. Tell the crew to just hang on to the bungees under the gunwhale when the boat comes up, and then come around to the stern to get back in afterwards; when the boat comes up, the person on the centerboard tries their hardest to at least get half way over the gunwhale so as to keep the upwind side weighted down.
  • If the mast is pointed towards the wind (a situation in which a double capsize is very common), the crew will be on the upwind side when the boat comes up. Have them hang onto the hiking straps as the boat comes up so their bodies are draped over the gunwhale. If they  weigh enough--taking the wind's power into account changes the meaning of 'enough'--the person on the centerboard can dry recover, particularly if he/she scrambles quickly across to the upwind side. If the crew is lighter than the person on the centerboard, the person on the centerboard should plan to go down into the water and get back into the boat from the stern (holding on to the boat at all times). 

Under almost all capsize conditions where you're not right by a lee shore or dock, the person on the gunwhale can take as long as they want to consider the situation and to discuss it with the rest of the crew. 

  8008 Hits

How to Trap Single-Handed (video)


1. Wear comfortable, non-restrictive gear and as many temporary pirate tattoos as possible.

2. Get a really, really long tiller.

3. Have awesome background music. 

4. Get out there.

  6311 Hits

Single-Handing in High Wind

Single-Handing in High Wind

Most senior dinghy tests involve assessing the skipper's ability to single hand a dinghy in high winds. And indeed, this is an essential skill. Imagine that you're out in the South Sailing Basin on a beautiful summer afternoon. It's blowing 15 knots, and you and your crew are hiked out all the way when suddenly the hiking strap breaks, and your crew ends up in the drink. (See e.g.  http://youtu.be/ZZTwH8C5bjo for an excellent demonstration by our current Commodore). If you can't pull off a single-handed crew overboard maneuver, your crew will end up on the rocks by Emeryville while you wait for the rescue skiff to arrive.

Here are a couple of pointers which will help you single-hand like a pro.

Depowering the sails. Unless you have the stature of an NFL linebacker, chances are that you will have difficulty keeping the boat flat unless you take some steps to depower the sails. Reefing the main and furling the jib are good starting points. Tightening up the luff of the sail with the Cunningham and/or reefing line will help to flatten the sail, reducing its heeling force. Loosening up the vang or gnav will allow the head of the mainsail to twist and luff, all the while keeping the bottom of the sail powered up.

Balancing the boat. Balance is always key in sailing. Since you no longer have crew in the boat, you'll have to use your own weight much more effectively. Moving forward is essential; otherwise, the bow of the boat gets battered around by waves. Aggressively hiking out will help keep the boat flat. If you're lucky enough to be wearing a harness and your tiller extension is long enough, you can even go out on the trapeze! 

Tacking and jibing. Tacking a dinghy while single-handed in high wind can be quite challenging; large swells crashing against the bow of the boat tend to slow the boat before it passes through irons, causing the tack to fail. Furling the jib and loosening the vang as suggested above compound the problem, as the boat no longer points as high. In some situations, jibing the boat is the only viable option for switching tacks. For this, loosen up the vang (if this wasn't already done), and start the jibe with a maximal amount of boat speed. You'll have to aggressively use your weight and the tiller to keep the dinghy from rounding up and broaching.

Continue reading
  10066 Hits

Use The Force

Use The Force

When we sail we use all our senses, but the one we rely most heavily on is our sight.  This was brought home to me when I took my first Wednesday night keelboat lesson several years ago.  I had grown accustomed to using the telltales on the shrouds to get a general sense of the wind when sailing the dinghies.  I even carried some bits of yarn in case the boat I was on didn’t have any.  I took the helm on the keelboat on a dark night and--oh crap--I couldn’t  see the tell tales.  I struggled that night, but realized that what had started as an aid had become a crutch.

The last Monday night advanced dinghy class, we worked on sailing without any sight at all.   But you don’t need a class to try it.  First make sure you have decent crew who is not blindfolded, and that you’re in an area with a lot of space (few boats and no obstructions).  Pick a day with moderate wind.   Put a blindfold on and try to hold a course.  Your crew can give you feedback.  Try to feel the puffs of wind before they hit the boat.  Pay attention to the balance of the boat.  Listen to the sound of the boat moving through the water.  Play with the main sheet.  Can you tell when the boat accelerates and decelerates?  Smell your gear, yeah, you should probably wash it.   Try sailing different points of sail.  If you’re feeling confident try a tack.

It’s as easy as bagging womp rats back home in Beggar’s Canyon.

  6294 Hits

Rudderless But Not Adrift: Sailing Without Your Rudder

We covered rudderless sailing at our Monday afternoon advanced dinghy lessons last week. Knowing how to rudderlessly sail is crucial not only in the (sort of rare at CSC) event that your rudder falls off (!), but also deepens your understanding of sail trim, boat handling, and makes you look pretty epic out there on the Bay. And let's face it: if you look good, you're probably sailing gooder.

It's also a skill you need to know to pass your senior dinghy & keelboat practical tests at CSC.

One simple resource that can be useful to get your started is this rudderless e-book (click the link to download), written by CSC member Joel Brand. 

Some pointers from our rudderless practice session and discussion last week:

If in a dinghy, try and get your rudder completely out of the water. It can still affect your course if it's in the water. As with all these tips provided below, however, try all sorts of different ways to maneuver and see what happens. Try it with the ruddder up, then down and swinging freely. Wind strength, waves, sail plan, and weight in the boat will all affect how your actions impact your course corrections...much like on any given day. Experiment!

Continue reading
  14003 Hits

Notes, Pictures, Video from our Recent Racing Study Group


b2ap3_thumbnail_IMG_3314.jpg

As you may have heard, during the month of April we conducted a racing study group with the intention of improving racing skills, rules and tactics for club members.   The group was oversold with 22 members and 4 volunteer instructors.  We were fortunate to recruit some of our best racing resources to lead both classroom and on-the-water practice sessions, including Cory Schillaci, Paul Kamen, Seamus Vanecko, and Mark Playsted.  In this post I want to share a couple of pictures, Cory's rules quiz handout for you to test your own knowledge of the rules, and the entire tactics classroom session video by Paul Kamen.  I did not take pictures from the on-the-water sessions because we were all on the water, but suffice to say it was exciting with up to 11 boats on the water plus this skiff - and with at least one NASCAR style pile up.  Fortunately there was no damage or injuries.


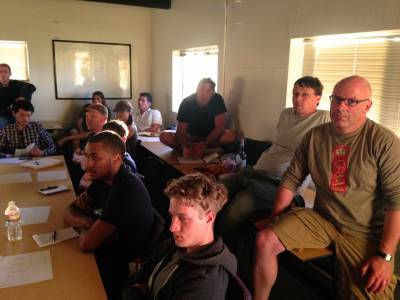
Standing room only - we more than filled the Marina conference room


Continue reading
  5661 Hits

My First Advanced Dinghy Class

The first class was last Monday (after the time change), and it will run through September with a couple of holiday exceptions from 6 pm to sunset. Jennifer Kroon is organizing this and occasionally teaching, as she did in the first class.

We had 7 boats and 14 sailors. We did what Jennifer called warming up on our sailing skills. We were going to do a version of Ultimate Frisbee on the water, but the frisbee didn't float, so we did other things. We sailed several courses around  4 buoys (the goals for the Ultimate Frisbee) in a line (one boat after the other, a boat-length between each and the one following). Sounds easy, right? Not so easy with crews of different skills. So the lead boat can't get too far ahead, and the other boats have to do what they can to catch up. And sometimes the instructions aren't so clear, so there's a built-in chaos. And then the lead boat is told to set whatever course they want, and the other boats have to follow. Preferably doing a lot of tacks/jibes.

The theme of the exercise was right-of-way. In this relatively simple exercise, right-of-way situations are set up, and you have to deal with them. I failed on this. I was on starboard tack going into two boats, one on either side, both on port tack, and one on a collision course. I had no room to maneuver. I called "starboard", but the other boat didn't respond as quickly as I might have liked, so I moved to avoid him. The classic mistake. We both moved first one way then the other trying to avoid each other and eventually collided. I can't count how many times I've described this situation to my sailing students and how to deal with it, but when it happened to me, I punted. There's an Italian expression that describes this "tra il dire e il fare c'è di mezzo il mare" which basically means  “it's one thing to say it, and another thing to actually do it.” A learning experience, which is why we're all here.

Even these relatively simple exercises are much more difficult than anything you would do on your own, so they really hone your skills.

Jennifer talked a bit about the class. It's not going to get you to Senior by itself, but it's going to help you get there by improving your skills. She talked about the Senior test and the importance of judgement. Think about how you would handle an unconscious man overboard. There is no right answer, but there are wrong answers.

Continue reading
  5519 Hits
Tags: